
First off: crunches suck!! This is the number one thing we tell students to learn. If you’re going to remember ANYTHING from class, let it be this: stop doing “gym crunches”. Doing 100 crunches (or 500) a day won’t get you any results if you’re recruiting the wrong muscles.
I’ll never forget my first Pilates private session many many years ago. I couldn’t believe I had been doing abdominal crunches completely wrong. I did about 20 reps the correct way and was sore for days. I was humbled; and totally hooked.
Here’s the game changer: your hip flexors (specifically the “iliopsoas” for the anatomy nerds).
Most of us have tight, shortened hip flexors. If you run or bike a lot, they get shortened. When you wear high heels, they get shortened. When you sit at work, in traffic or anytime (you guessed it) your hip flexors shorten. Basically, no matter what you do, those babies are probably getting tight.
So why is this a problem? When muscles are tight, they have a hard time knowing how to relax. When you do a traditional crunch, your hip flexors take over for your abdominals and your pelvis “tucks under”, flattening your lower back into the floor. If you’ve ever done 100 crunches a day and wondered why you’re not getting flatter abs, this is why!!! Instead of allowing your hip flexors to grip and your belly to puff out during a crunch, you need to learn to “shrink wrap” your abs and work from the inside out. 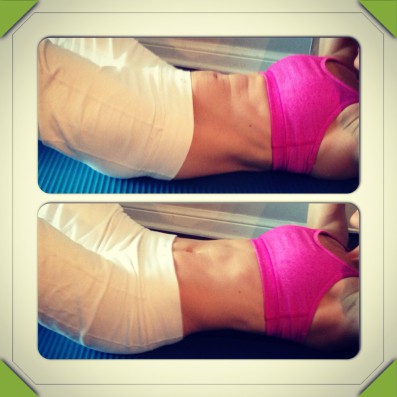 Here is a before and after shot.
Here’s what to do:
1) Lay on the floor with knees bent, feet flat on the floor. Relax your glutes and keep a neutral S-shaped spine (there may be a space between your lower back and the floor).
2) Find your hip flexors by placing your index fingers just under your pelvic hip bones. It should feel like the crease where your leg meets your torso.
3) Lift your legs into the air, keeping knees bent. If you feel a rope-like muscle kick in under your index fingers when you lift your legs, you’re on the right spot.
4) Put your feet back on the floor and try to relax the muscle under your finger tips. Relaxing your butt and keeping a small curve ( ie. a neutral spine) in your lower back will help!
5) Now that you’ve found your hip flexors and you’ve relaxed them, you must KEEP them relaxed! This may take some practice.
6) GO FOR IT: Place hands behind your head, inhale to prepare, then exhale to curl your chest off the floor, keeping your butt cheeks and hip flexors relaxed. NOTE: don’t lift as high as you can. You’re looking to see your stomach flatten, not puff out like a loaf of bread rising in the oven. TIP: pull up on your kegels as you exhale to engage your deep internal lower abs called your transversus abdominus.
And remember, you can’t “spot reduce”. That means you can’t expect to chisel out your abs by doing just crunches! Learn to engage and stabilize your core during all your activities. And don’t forget…80% of abs are made in the kitchen!!
Here’s to your future 8-pack 🙂 See you in class!!